Chitting Potatoes
June 23rd, 2021 | Categories
Chitting your seed potatoes means encouraging them to sprout shoots prior to planting. While not a crucial task, chitting certainly helps a lot when it comes to successful potato cropping generally, and in producing an earlier crop too, whether it’s at home in the garden or in an allotment.
While potatoes do well in the UK’s climate, they are very sensitive to frost, so you can’t plant them outside until the temperature has risen, and the risk of nightly frosts has passed. But that doesn’t mean you can’t get them ready to go in the meantime. Chitting your potatoes can be done indoors earlier in the year in winter and means you waste no time at all getting them ready for planting outdoors, saving them sprouting from scratch when the frosts have passed.
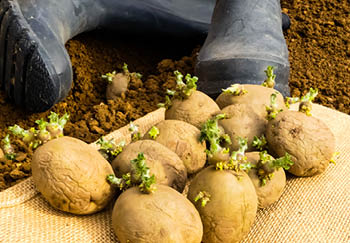
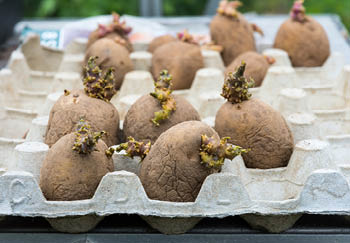
What is Chitting Potatoes and What Does it Do?
As mentioned, chitting seed potatoes is when you encourage them to start sprouting shoots prior to planting. These shoots are just what potatoes do to make the potato plant from which then new potatoes to grow. Chitting potatoes can be done indoors in winter while you’re waiting for conditions to be right to plant outdoors. If you don’t chit your potatoes before planting, they’ll just sit there for a while in the soil until they begin sprouting anyway.
There’s also a chance they can rot before they get to the stage of chitting. Chitting potatoes before they go in the soil not only saves you time, but it also keeps them fresh and viable, because they are using energy to grow sprouts that want to be fed with water and nutrients so are therefore ready for that when they do into the soil because they are focusing on growth.

How to Chit Potatoes
The how of chitting potatoes is very easy, and requires just a few things:
- Seed potatoes of choice
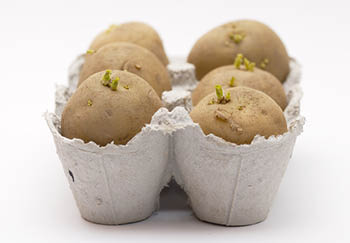
- Container such as an empty egg carton or tray
- Area with plenty of natural light and sun
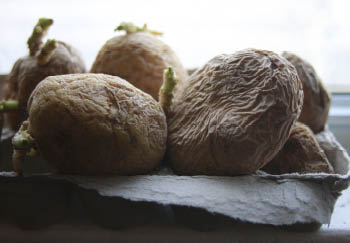
First thing, look for the eyes on your potato, these are small, bumpy indents where they usually sprout. Place these in the egg carton or tray facing upwards. Next, take these over to a place or area inside your home, likely a suitable windowsill, where they can get a lot of light and sun, and have a temperature above 10°C. A greenhouse will work too so long as you can ensure they won’t be exposed to frost.
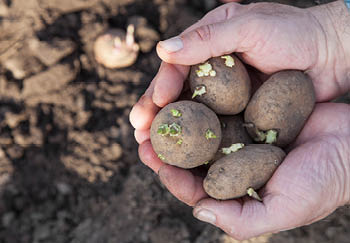
The next process is simply time. You will leave the potatoes here for six weeks or so, when they will be ready to plant with some really nice sprouts but remember only do this when the risk of frosts has passed. Your chits should look really knobbly and a kind of greenish/purple colour. If they are white then they’re not getting enough light.
When to Chit Potatoes
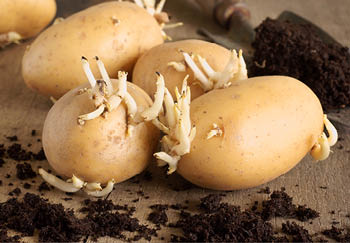
No matter the type of potato be it maincrop, early, or second early, they can all be started off chitting in late January or early February. It should be about six weeks before you intend to plant the potatoes outdoors when the outside temperatures are better, with no nightly frosts. Frost will kill them off. Frost is bad. Depending on where you are in the UK, you could even start them in March too. Just work out your own timings based on when the temperatures are set to rise outside. Top tip – If you start too early it’s fine to simply rub the shoots off and let them grow again.
What to do After Chitting Your Potatoes
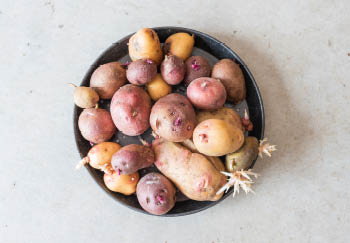
Just wait. The potatoes are ready to be planted out when the shoots are about 1.5-2.5cm (0.5-1in) long, though it’s fine if some are longer. If some potatoes have lots of sprouts after chitting you may wish to remove some to keep three or four of the best, as leaving lots on can result in many small potatoes in your crop. Of course, if you want small spuds then just leave them all in place.

That’s How to Chit Your Seed Potatoes
And there you have it. It’s simple and straightforward to chit your seed potatoes at home and has the added advantages of saving you time when it comes to planting, which means your crop of lovely spuds will be ready earlier, not to mention increasing viability when it comes to planting outside. If you’re interested in how to grow potatoes outside in the soil or in grow bags, we have great guides for you to follow linked to below.


