Growing Potatoes in Grow Bags from Planting to Harvest
March 8th, 2021 | Categories
Growing potatoes at home in grow bags is a great way to grow a healthy crop of potatoes to enjoy. What makes it even better is that growing potatoes in grow bags is a relatively easy process which means gardeners of all skill levels and experience can have a go. The particularly great thing about grow bags is that you don’t actually need to plant in the ground, or even in a garden; they can be grown on balconies or areas where space may be at a premium.
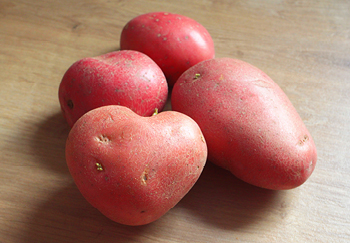
Potatoes are without a doubt, one of the most popular vegetables in the UK. As a nation, we love them. In fact, it’s our most loved vegetable. From chips, to wedges, to mash, to crisps, we’re consuming millions of tonnes of potatoes every year. Given this fact, it’s no wonder growing potatoes is very popular among gardeners. There are so many varieties of potato to choose from and grow, from all your favourites even to ones you don’t see in the shops! Did you know though that potatoes aren’t native to Britain? They were brought from the Americas by Sir Walter Raleigh in the 1580’. In the years since plant breeders have experimented and cross-bred to give us the plentiful choice in varieties we have today, literally hundreds. Some for yield, some for disease resistance, some for flavour, and some for ease of cooking.
If you want to grow your own potatoes in grow bags, then this guide will give you a good steer on what to do from the preparation, to the tools needed, through to planting and on to harvest. This guide will focus on growing potatoes in grow bags at home anywhere suitable and it’ll take you through all the steps and considerations. We have covered how to grow potatoes in the ground in another guide, you can read it here if you prefer this method. Ready to get started growing potatoes in grow bags? Let’s get started.
Why Grow Potatoes in Grow Bags?
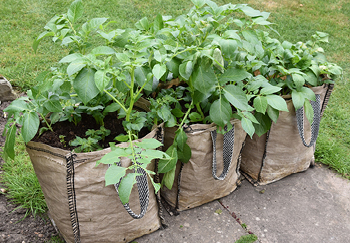
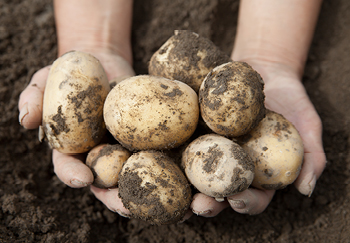
Growing potatoes in grow bags is a brilliant and easy way to grow potatoes in a space saving container. Good quality and sturdy grow bags are easy to come by and you will be able to reuse them time and again for years. Grow bags make it easy to grow potatoes in small spaces but they also make harvesting at the end of the season very easy too. All you have to do is tip out the contents of the bag, collect up the tubers (potatoes), and dispose of the soil on other beds or borders, as a soil improver. And why grow potatoes exactly? Well as mentioned earlier they are most popular vegetable in the UK. They’re also good for you.
Potatoes are rich in nutrients particularly potassium and they a versatile, staple ingredient for a variety of meals. Not only that, but you can also get quite a significant number of potatoes to yield from less land, faster again than most other vegetables or crops. That makes it a particularly attractive vegetable. Potatoes are also fairly easy to grow and will tolerate a broader set of growing conditions than other vegetables will. On top of that you have the choice of growing a whole host of varieties hitherto unknown in supermarkets and finally, potentially the most compelling reason of all, the smugness of being able to say you grew your own spuds.
What Variety of Potatoes Should You Grow in Grow Bags?
Before you plant, you need to consider what type or types of potato you are after. Then, get the correct seed potatoes for variety you want. Maybe it’s salad potatoes, or maybe you want great big jacket potatoes. Whatever the variety it will be seed potatoes you need to start with, as these are especially for growing potatoes. However, there’s a few things to note first.
Earlies vs Maincrop Potatoes
Potatoes are classified as being either earlies or maincrops. Early varieties of potato are ready to harvest much sooner than maincrops and are what we call ‘new’ potatoes. You may have noted that new potatoes are smaller, and this is why. Typically, they will have a smoother waxier texture. Maincrop varieties however are left a lot longer. They produce a larger harvest and are generally bigger potatoes.
In terms of harvesting, Maincrops are typically harvested in late summer or autumn. Early varieties which are typically harvested from early to midsummer and are further divided into first earlies and second earlies. First early varieties are of course first to harvest, while second earlies follow on a few weeks later. If you have your grow bags inside a greenhouse, they can be started earlier and will be ready to harvest even faster.
One thing to point out is that grow bags are generally better for early varieties of potato because maincrops need more space. Having said that, it’s not uncommon for maincrops to also be grown in grow bags, and you could even compensate for it by getting a larger bag, so they have room to grow. Whatever variety you wish to grow just be sure of their specific type, when to sow, when to harvest, and any individual needs or characteristics they may have.
Common and Not So Common Varieties
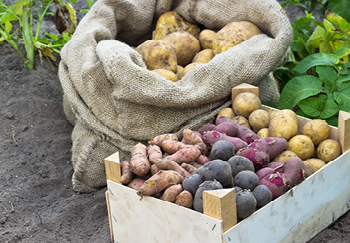
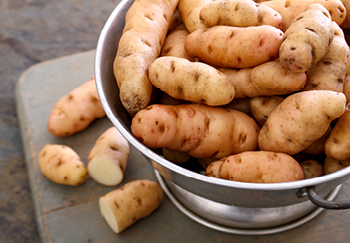
Here are some ideas on variety of potato you will have heard of and those that you’re unlikely to have heard of if this is your first foray into grow bag potato growing. This list below is just a small selection of the many varieties you can choose. We have focused more on earlies because they’ll grow well in the smaller space of your grow bag (versus in the ground), and you’ll get a nice balance of size and number of tubers (potatoes) at the end of the season:
Charlotte (second early)
A very popular salad potato that’s full of flavour with a waxy skin. Good to eat hot or cold.
Maris Peer (second early)
Boasting excellent flavour and creamy yellow skin, Maris Peer potatoes are great for boiling.
Anya
The Anya potato won’t win a beauty contest, but it tastes great, kind of nutty, with a waxy flesh. Great for boiling primarily but also nice for roasting.
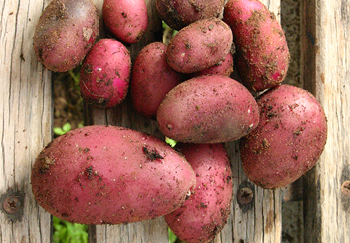
Red Duke of York
One of the few new potatoes with distinctive pink skin, not as waxy as some, a nice round shape and holds together well after cooking. It has a great flavour.
Vivaldi (second early)
Yellow skinned potato with a velvety texture. It is very good as a boiled potato and even better mashed because of its texture. In terms of flavour, it has mild notes of sweetness.
Nicola (second early)
A lovely tasting potato perfect for salads. It also copes better than other varieties with growing conditions that are less than ideal.
Arran Pilot (second early)
A nice flavour with a white-ish skin, perfect as a salad or new potato, delicious straight from the ground.
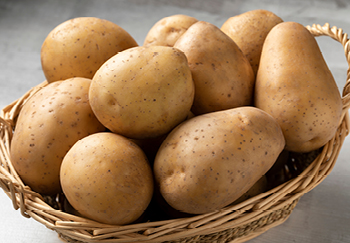
Maris Piper (maincrop)
Everyone knows the Maris Piper. In every supermarket and the most widely grown maincrop potato in the UK. Firm and creamy, with yellow skin.
Rooster (maincrop)
The red skinned Rooster is another very popular variety. It’s a true all-rounder tasting great mashed, roasted, baked and more.

General Growing/Harvesting Timescale
As mentioned, there are early (new) and second-early varieties of potato. Early varieties are harvested sooner when compared to maincrop potato varieties. Based on a rough start date sometime mid to late March/early April:
- First early potatoes take roughly 80 days after planting to mature and should be ready to start harvesting in mid-June.
- Second earlies take around 100 days after planting to mature and will be harvestable around mid-July.
- Maincrops take the longest time to mature, at roughly 130 days or around mid-August.
Please note, this is just a rough guide and you should research individual growing and harvesting timelines for your chosen varieties of seed potato. Weather and growing conditions will also be factors to consider. If you are in a colder region of the UK on average, it might pay to wait a bit longer to plant. If you have access to a greenhouse, you’ll be able to start growing sooner and even extend your growing season.
How to start Growing Potatoes in Grow Bags
Now you know some more about potatoes you’re ready to get started growing your own at home in grow bags. It pays to know what to do in advance so read through our guide, get up to speed, and then when you’re ready to go, get started! Remember, you’ll be starting off from specially prepared ‘seed’ potatoes which are certified virus-free. You can generally buy seed potatoes from late winter onwards.
What You Will Need
When it comes to growing your own fruit or vegetables, preparation is the key to success. Before starting anything, gather some necessary items and materials:
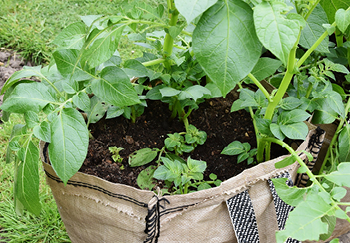
Potato Grow Bags
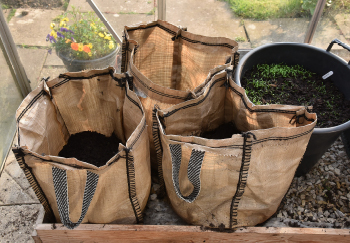
You only need one to get going but typically you can buy them in bundles of two or three. One large grow bag of about 40 or 50 Litres will allow you to place several seed potatoes which should spawn a few plants for a good yield.
Seed Potatoes
As mentioned, you cannot grow from supermarket potatoes and so need to buy specially grown seed potatoes for your crop. Select the variety or varieties you want. Because of limited space, early varieties generally go a bit better in grow bags.
Compost
The bag needs to be filled with a good quality compost, preferably one that is suitable for growing potatoes. Most good quality composts for vegetables will do the job and it’s as easy as buying a bag or two from any garden centre.
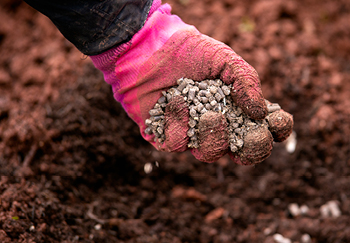
High Potash Fertiliser
Most composts will be full of nutrients at the start but as your potatoes grow these nutrients will be leached away, so a high potash fertiliser will help to add more nutrients back to your crop ensuring good yields and healthy potatoes.
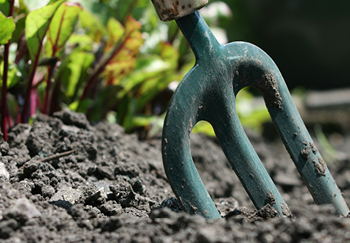
Hand Fork
For digging and loosening the compost as you pour it into the bags. The soil should be nice and loose to make it drain well and also to allow your seed potatoes and their plants to establish a root network.
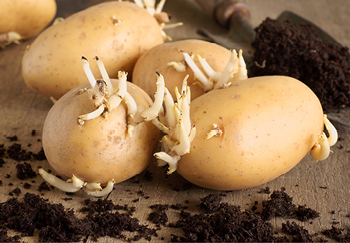
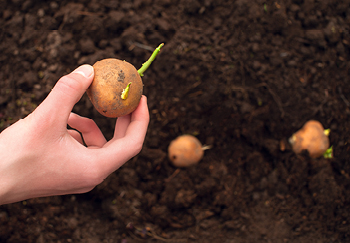
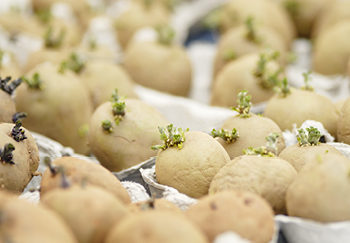
Preparing & Chitting Seed Potatoes
After you have everything you need here’s what you will do. First, it’s about preparing the seed potatoes which means chitting them. Chitting potatoes simply means letting them grow more shoots, which in turn gives you a bigger potato crop, and faster growth. You start this off indoors by letting them sprout, in trays or old egg cartons. Just let them sit in a cool, dry, bright area, like a north facing window, until you see that little shoots about one to two centimetres have grown. This can take four to six weeks. But it is well worth it. Be sure to plan this into your timeline and start chitting by roughly the end of January/early Feb. If you are in a cooler part of the UK it could better started later.
Grow Bag Placement
When choosing the spot for your grow bags in the garden, patio, or balcony, try to opt for an open position, in full sun. Don’t have it anywhere it could get damp or wet as this can lead to disease in your crop. Ensure that the drainage holes in the grow bag are not blocked by anything. If growing inside of a greenhouse, you can start off any time from February onwards. All you need to ensure is that the greenhouse is frost free and has a daytime temperature over 10°C.

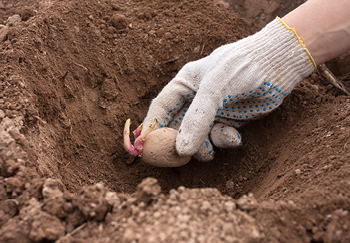
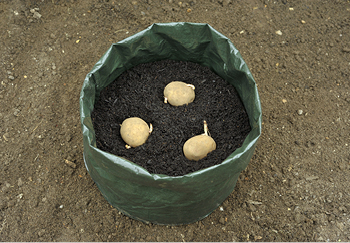
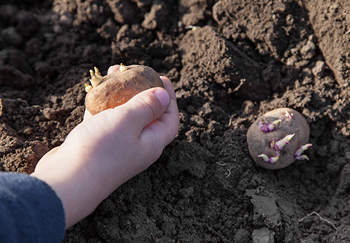
Sowing & Planting Seed Potatoes in your Grow Bag
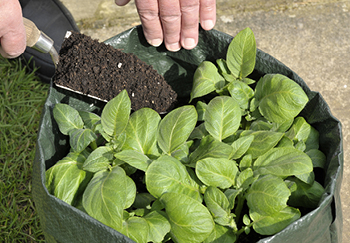
Around late March/early April it will be time to plant your chitted seed potatoes. Prepare the bag to receive the seed potatoes by opening it up and pouring in some compost about 20 – 30cm worth, or roughly a third (depending on the size of your bag). Take your fork and loosen the compost breaking up any compacted areas or chunks. Then, take your seed potatoes placing them chit facing upwards and spaced out (the plants need to grow upwards), then pour on another 20 – 30cm of compost, or roughly two thirds full.
If using a good compost, you shouldn’t have to use fertiliser at this stage, but you can opt for a slow-release type or organic fertiliser, dug into the soil just before you place your seed potatoes. Once done, give it a good watering until the soil appears soaked through. And that’s it, starting off growing potatoes in grow bags is pretty simple. There would be other tasks like de-weeding and preparing the soil if planting in the ground, but you don’t need to do that with the grow bag method.
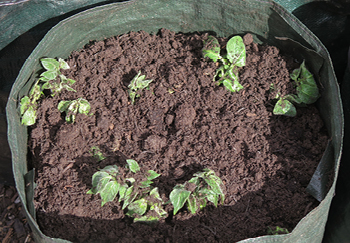
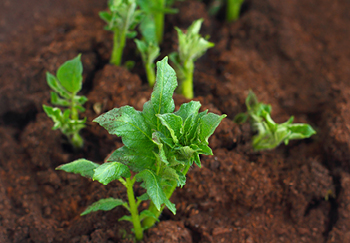
Growing
As the plants grow in the bags, top up with more compost once the shoots are above soil level roughly 15cm (half a ruler) tall. If the weather is dry or particularly hot, keep the plants well-watered. This is even more important for first and second earlies. Depending on the type of feed/fertiliser you have, feed every other week or as instructed. Continue to keep an eye on things over the weeks until you approach harvest time. Rest assured that most of the work has been done at this stage, and we think you’ll agree it’s quite straightforward.
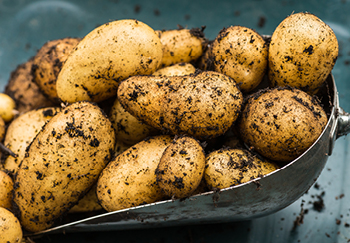
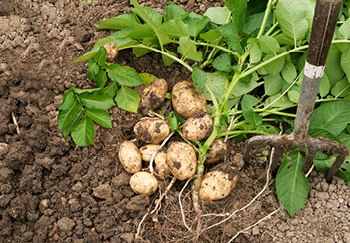
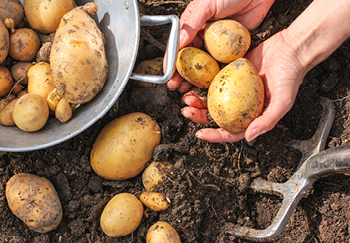
Harvesting your Potatoes from Grow Bags
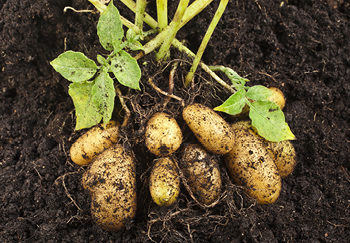
As mentioned earlier, when to harvest will depend on your chosen seed potato variety, weather and growing conditions. As a general rule because potatoes tend to grow larger over the growing period, start harvesting first earlies as ‘new potatoes’ when their plants begin to flower. You can continue to harvest early varieties in stages from this point forward, leaving the remaining plants to grow on as they are needed. Following an approach like this ensures you enjoy them at their freshest.
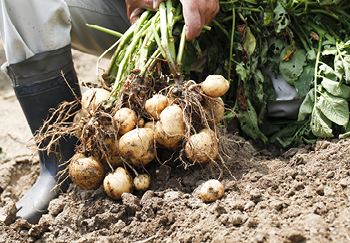
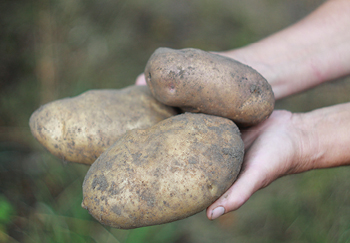
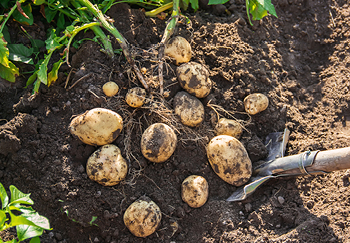
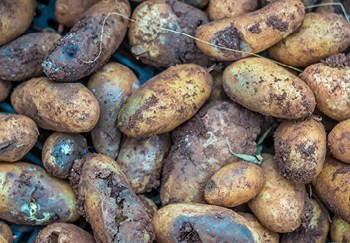
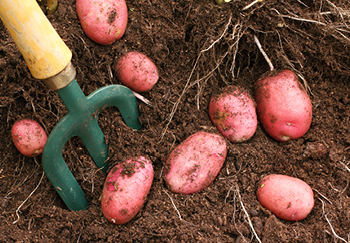
Maincrop varieties are best left in the bag for at least two weeks after the leaves and stems wither, to allow their skins to set. Cut down the stems with secateurs to just above soil level as the leaves wither. Then, on a dry day, harvest with a fork taking care not to accidentally pierce any of them. Brush off soil then let the potatoes air dry for a few hours. Wash and scrub potatoes before using. Then enjoy!
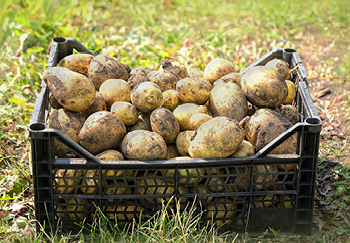
Storing Them
Home-grown potatoes, particularly maincrop potatoes, will store well for many months in a cool, dry and frost-free place. Early varieties will only store for a few weeks at most. When you do store, ensure you only store the best potatoes and remove any that show signs of damage. Also, do not wash before storage. It’s important to know that they must be in darkness to stop them turning green and therefore poisonous. Get some thick brown-paper bags or sacks as these will do the job nicely. Check on them regularly to make sure they are OK and continue to remove any that have gone bad.

Common Problems to be Aware Of
Potatoes can suffer from some problems, but with the right preparation, care and attention you will have minimal issues. Here’s a run through of what to know and watch out for though. The good thing is properly growing potatoes in grow bags reduces the risk of most of these issues:
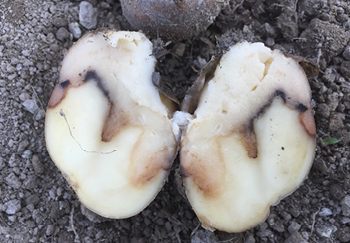
Potato Blight
Potato blight is a common fungal disease of which there is no cure, which turns foliage yellow with dark patches and causes the tubers to rot. Some options include growing a resistant variety of potato. You can also cut the potato plants down at the first sign of infection, as the fungus will not have reached the potatoes by that stage. Then harvest the tubers as soon as you can.
Potato Blackleg
Potato blackleg is common bacterial disease of potatoes which causes a black rotting at the base of the stem. Initial infections cause stunted growth and yellowing stems. Unfortunately, there is no cure, and the only real option is to dig up all traces then destroy them by burning.
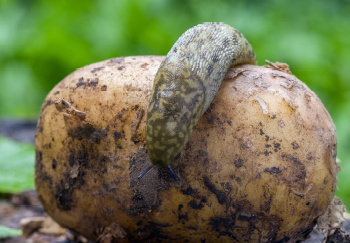
Slugs and Other Pests
Slugs, cutworms, wireworms and potato cyst eelworm are creatures to watch out for and all will cause damage to potato crops. Choosing slug resistant varieties might be an idea to start but if you happen to be unfortunate enough to get an infestation they could ruin your whole crop. Through a combination of using the bags, and regular checks, you shouldn’t encounter any pest problems.
Soil
This one is a bit irrelevant (only really if planting in the ground) but worth mentioning, do not use ‘old’ soil from somewhere. It may have old organic material that can bring diseases and pests harmful to your potatoes. The good thing is any compost you buy will be packaged ‘fresh’ and free of anything harmful.
Home-grown Spuds from Grow Bags
There you have it. Now you know how to tackle growing potatoes at home in grow bags. When you follow our guide through and do it, you’ll wonder why you didn’t try it sooner. Most seed potatoes and plants produce a bountiful crop, so you’ll have plenty to enjoy over the growing season. Will you mash, boil, make chips? Do it all? Why not?! And once you’ve grown your first chosen variety all the way to harvest, why not try get some more grow bags and try some others next year?
Useful Links
- Shop Online for Seed Potatoes
- Top 5 Fast Growing Vegetables (Video)
- Growing Potatoes from Planting to Harvest (Article)
- Growing Chillies from Seed to Harvest (Article)
- Guide to Growing Tomatoes in Pots (Article)
- Grow Your Own Herbs (Article)
- Grow Your Own Strawberries (Article)