Growing Tomatoes from Seed to Harvest
February 8th, 2021 | Categories
Tomatoes are one of the most popular, most eaten, home-grown vegetables around. While technically a fruit, because botanically, a fruit is a ripened flower ovary and contains seeds (which a tomato is and has), it’s also a vegetable, because we consume and consider it as one. It’s a quirk that it shares with peppers, pumpkins, cucumbers, peas, and some others. For simplicity we will refer to it as a fruit in this guide since we are talking about the fruit produced by a plant.
Growing tomatoes from seed at home is a fairly easy process – even for beginners – that will reward you with a plentiful harvest all of your own making to enjoy during the summer months, even from just a few seeds. There are many different varieties of tomato from sweet cherry tomatoes, to plum, to super-sized full-flavoured beef tomatoes. Whatever variety you are seeking to grow this guide will give you a good steer on what to do from seed all the way to harvest.
Why You Should Grow Tomatoes at Home
The tomatoes you buy in supermarkets are grown in soilless environments with artificial fertilisers injected into them. This is to guarantee yields, shelf-life, and disease resistance year-round – tomatoes need good sun to grow which is at a premium in many regions of the UK – and while perfectly safe, it comes at the expense of other qualities like flavour. They are also typically harvested before they are fully ripened. If you compare that to how they would grow naturally, the kind you’ll grow yourself, the flavour is night and day – the true taste of a tomato – and you can harvest when they are ripe and ready to go.
Additionally, homegrown tomatoes are healthier with higher levels of the pigment ‘Lycopene’. Lycopene has been shown to help unclog blocked arteries and is thought to be a reason the Mediterranean diet is so healthy.
Finally, a single plant can produce hundreds of tomatoes in a season, so it can pay for itself many times over. Not bad at all.
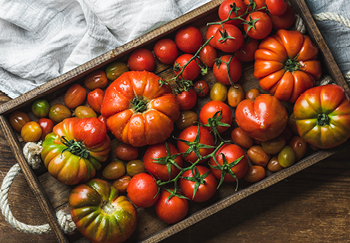
What Variety of Tomato Should You Grow?
There are a few main varieties of tomato you can grow depending mostly on how you want to use them:
Classic
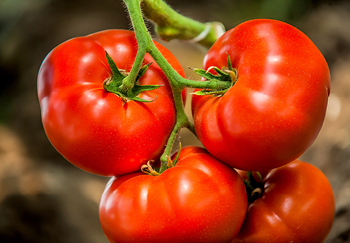
The familiar, round variety and the most popular type of tomato. They’re the all-rounder; good for salads, grilling, baking, or frying.
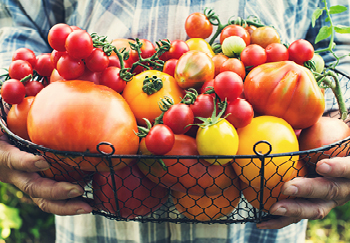
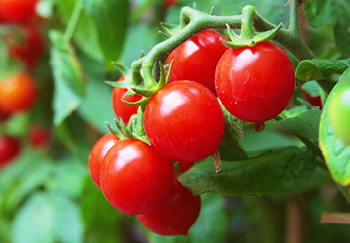
Cherry
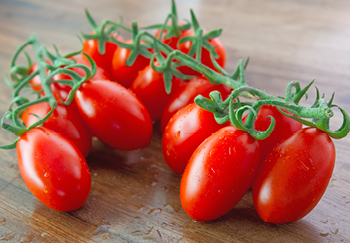
Cherry tomatoes are the smallest tomato but with an intense, sweet flavour. Most cherry tomatoes are red, but golden, orange, and yellow colours also exist. Cherry tomatoes are delicious eaten whole and raw; indeed, they are often added to salads, or cooked and added to pasta dishes.
Plum
These have the distinctive oval shape, with a firmer flesh, fewer sees and less liquid in their centre. Because they are less watery, they are the natural choice for pizza and pasta sauce, and their fleshy texture makes them great for barbequing too. Flavour-wise, they are sweet but typically not as much as cherry tomatoes.
Beef
One of the largest varieties, sometimes displaying pronounced ribbing, their size and shape make them excellent for stuffing and baking whole in the oven. They have a classic tomato flavour, sometimes sweet.
Each of the main varieties have their own shape, flavour, and best use cases as above. Additionally, each has its own subset of varieties within. We won’t get into listing them all here, as that could fill a few pages on its own, but something to be aware of.
How to Start Growing Tomatoes
To grow tomatoes successfully, it pays to know what to do so you can maximise your harvest while minimising any growing pains (pun intended) and effort.
Seeds & Bush v Cordon
While you can buy tomatoes as young plants, it is more fun and rewarding to grow them from seeds. At this stage, decide what tomato you want to grow and purchase the seeds. Make sure to know if they are a bush or cordon type for later – it will affect your position and if you need canes for staking.
The difference between a bush or determinate tomato plant, and a cordon or indeterminate tomato plant, is that the bush type plant will grow like a bush about one to three feet high and outwards. Whereas the cordon type is the most recognisable, quintessential really, growing very narrowly upwards to a height of over two metres and requiring support like a bamboo cane. Both bush and cordon types can produce many varieties of tomato, and their care is much the same when you get to planting. Bush types would be more suited if space is at a premium, and time too, as they require no pruning. Cordon types do require ongoing pruning, but it’s not a taxing process by any means.
If you aren’t keen on growing seedlings yourself then buying young tomato plants will do the job just fine and are available to purchase from any Squire’s in spring. Whatever you decide just be sure to consider how many plants you want because one seed can equal one plant, which can make hundreds of tomatoes, so factor in your available space, how many tomatoes you want, and time you can dedicate to ongoing care.
Soil and Position
Whether bush or cordon, grown in the ground or in pots, all tomatoes require a rich fertile soil, or peat-free potting compost. Tomatoes are sub-tropical plants, so they love the sun and warmth, which means as much sun as possible, in a position that also offers shelter and protection, against a wall or fence. The warmer the spot the faster the process. They’ll also need sufficient water, but can’t be waterlogged, so the soil needs to be well-draining to avoid disease. It’s best to avoid placing next to hedges as the nearby soil will be too dry.
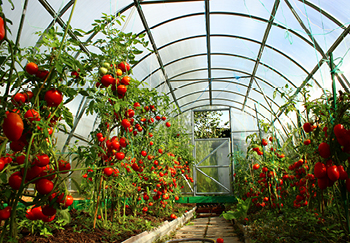
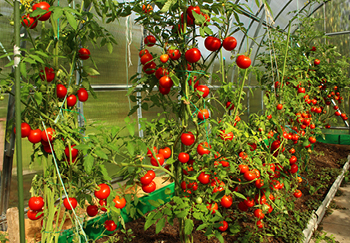
In cooler parts of the country tomatoes have a better chance of growing in a polytunnel or greenhouse. As we know, it’s all too common for the UK to have a cooler than usual summer which will directly affect any outdoor tomato plants. Whether bush or cordon, your plant will have a relatively small footprint and should produce hundreds of tomatoes each season, with the right winter care of course.

Sowing
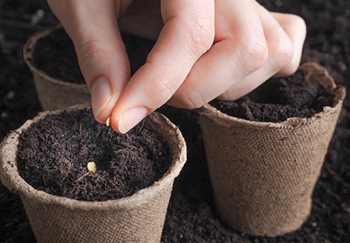
The best time to sow your tomato seeds will be from March to April. Sowing can be done earlier if growing in a greenhouse. No matter the final position you have in mind, it’s going to be easier getting going if you plant your seeds in pots or a container before transferring later. This will provide the necessary protection and allow you to easily monitor and care for the seedlings until they are ready to be transferred to the ground or pots, if not already in your greenhouse or polytunnel.
Your next step should be to think about how many plants you want. If you’re only growing a few plants, sow three to five seeds (each plant can produce hundreds of tomatoes) into your pots or container, pre-prepared with your rich fertile soil or peat-free potting compost. If you have several small pots, it will need to be one or two seeds per pot. If you have larger pots, you may be able to place them all in a single pot. The key is leaving some space between each to avoid crowding.
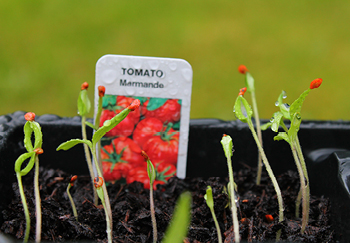
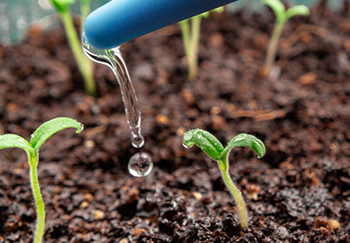
After this, cover again with a thin layer of compost and water lightly with a fine-rose watering can or plastic bottle with holes poked in the lid. If you want to ensure you have a good number of plants, sow a few more seeds than you want plants to allow for some losses, and so you can select the strongest seedlings later. Afterward, place them somewhere warm to germinate, such as a windowsill or greenhouse, ensuring a consistent daytime temperature around 20°C to 25°C and night-time temperature no less than 15°C.
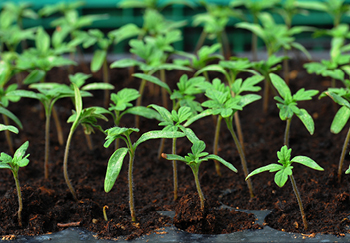
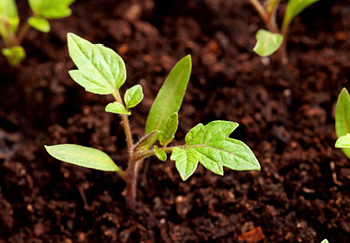
After roughly a week the seeds will have started to germinate – if you see that they have two true leaves and are sprouting up – how exciting! At this point, place somewhere with plenty of light and at the same temperature range if not already. Typically, they will need feeding from about the fourth true leaf stage, especially if you have used seed compost to pot them up (it is usually lower in nutrients than potting compost). Use a high potash tomato feed made up according to the label recommendations. If you see the bottom leaves start to turn yellow or purple, this can be a sign that they are running out of nutrients (purplish tints can also be due to low temperature).


Actively Growing & Preparing to Transfer
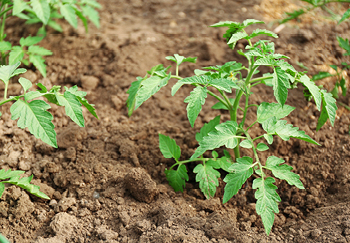
With all your feeding and care the plants will grow and grow and when they are roughly 15cm tall it’s time to get ready to transfer the young plants out of the container to pots. If you already had them in pots, then you don’t need to prepare to transfer them anywhere at this stage, unless, you used a large single pot for the seedlings, in which case now might be a good time to transfer to individual pots to avoid them crowding one another. When transferring, be sure to dig out an area in the pot they’ll be transferred to first.
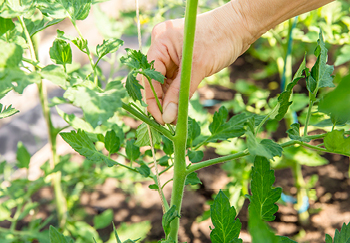
The hole needs to be deep enough to plant without curling the roots. Then, carefully dig the plants out of the container, if the soil holds together nicely by the root network (it doesn’t fall apart) then they are good to go. When transferring, place them gently without firming them in, support any stems if necessary, by tying them to a small pea or bamboo stick, and give them a light watering too.
Something to be aware of if you are planning to fully grow outdoors, you will have to harden them off for several weeks before finally transferring to the garden. Hardening off means getting them gradually used to outside temperatures. You can do this easily by leaving them outside for a short time on settled days and bringing them in at night. As time goes on leave them out for progressively longer until they can be left out all night. However, this should only be done mid to late May after the risk of frost has passed.
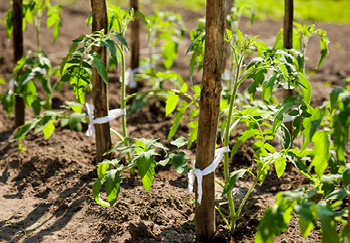
Planting
After they have been hardened off and the last frost has passed, your plants can be transferred to their final positions. If in the ground a good place would be a sheltered but sunny border with soil that has been dug in with plenty of compost. The same goes if opting for pots, dig them in with compost and ensure the pots are placed in a sunny but sheltered position. Consider constructing a shelter or buy one to shield the plants from any adverse weather conditions. It’s very important they have enough space to establish a good root network, so don’t plant them too close to one another, leave at least half a ruler length if you can, but ideally a foot apart.
If you have a greenhouse, which could allow for either ground or pot planting, or both options, then the method is much the same. It will be well sheltered already, and you will benefit from a longer growing season, potentially with hundreds more tomatoes per plant. Ensure a good airflow to avoid higher temperatures and condensation which can encourage disease. At this stage you’re very close to producing your own tomato fruit!
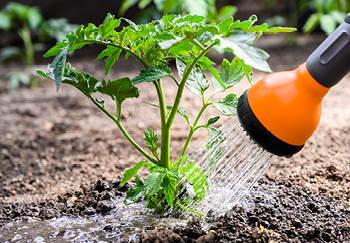
Watering & Feeding
Tomatoes are thirsty and hungry. The key to watering is to be consistent to avoid splitting fruit, and Blossom end rot (which comes from a lack of calcium). So, water little and often and feed weekly with a high-potash fertiliser once the plants start to flower. Every four weeks opt for an organic compost to give your plants an extra boost to grow lots and lots of fruit. If there’s a lack of nutrients your tomato will produce more leaves and fewer fruits.
Pruning & Ongoing Care
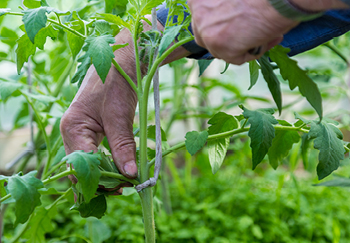
The taller growing cordon type tomatoes will require stopping (halting upward growth), pinching out (removing side-shoots) and staking (tying plants to canes with soft string). A combination of Stopping and Pinching out is done to control the height of the plant and get it to focus on the existing tomatoes rather than continuous growth.
To stop the plant simply cut the top after four or five trusses have formed. You can start pinching out at his point too. Look for any little tips that start to grow out from between the main stem and trusses and pinch them out. It is quite easy to do but should be done gently to avoid any damage to the plant.
Also, when the first tiny fruits begin to appear, strip away the leaves underneath to allow light and air to reach them better. They can become quite thick with leaves, so it is important to allow airflow which in turn protects against disease. Don’t forget, you should be continuing your regular watering and weekly feeding routine.

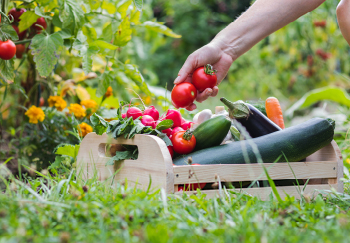
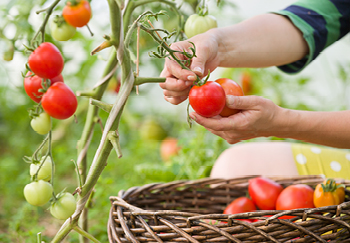
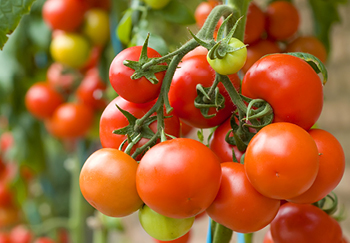
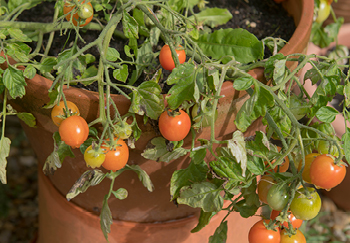
Harvesting
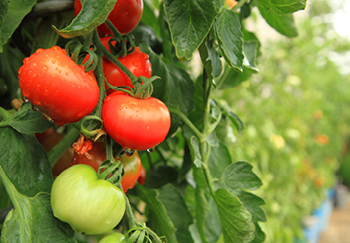
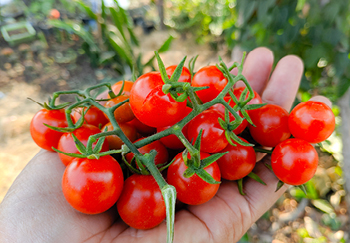
Congratulations on getting to this stage – you’ve grown your own tomatoes! Different varieties will grow and ripen at different times, and tomatoes on the same plant can also naturally ripen at different times too. To know when they are ripe and harvest, be sure to know the specific signals for your tomatoes, typically a colour and firmness change. Start picking at this stage. Larger tomatoes like beef tomatoes will take longer to ripen generally.
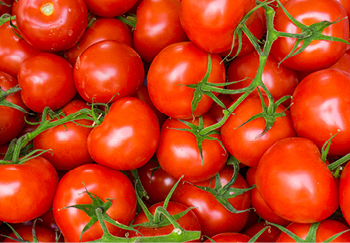
Tomatoes are best eaten straight from the vine. They don’t freeze well, but you can store them for a week or so at room temperature. Despite the fact we’ve been trained to store tomatoes in the fridge, it’s actually best to avoid this where possible, as this will change their texture and reduce the flavour.
When the end of the growing season arrives harvest and place all remaining tomatoes in a warm, dark place to ripen. You can also place any unripened tomatoes in a drawer next to a banana, which aids ripening.
Actions for Next Year
Unfortunately, your tomato plants will die at the end of the season when the frosts come back, which is a shame. But by that stage you will have produced an abundance of fruit so it’s not all bad. What is good though, is that tomatoes are self-pollinating, which means you can just collect seeds from those you already produced and the plants you grow next year will be the same as the parent plant!
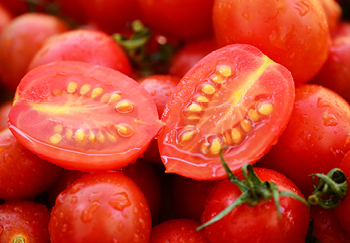
- Choose a few healthy tomatoes that are ripe and harvest them.
- Cut them in half and scoop out their seeds.
- Deposit into a shallow container of water. You’ll see a mould form after a few days – this is OK – it helps remove the jelly like matter around the seeds, which can prevent germination.
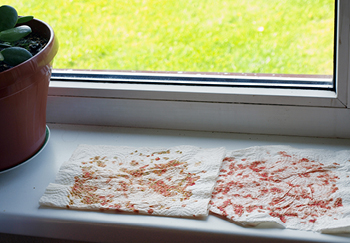
- After five days, pour the seeds through a sieve and wash gently to remove any lingering mould or jelly.
- Finally, you need to dry them out, and this can be done by placing them on a piece of kitchen roll. Once that’s all done store them in an envelope somewhere cool and dark until next spring.
Common Problems to Be Aware Of
Tomatoes can suffer from some problems, but with the right preparation, care and attention will see you right. Here’s a run through of what to know and watch out for:
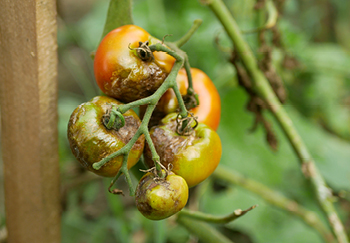
Tomato Blight
This is a disease that causes fruit and foliage rot, most caused by wet, damp weather and conditions, and poor ventilation. Ensuring the soil is well-draining and the leaves are picked will help to protect against this. It’s not as common on tomatoes grown in greenhouses.
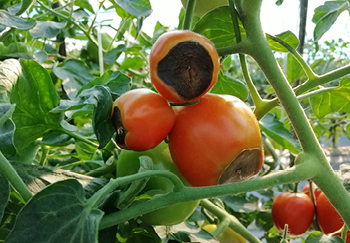
Fruit Problems
Blossom End Rot (a dark patch at the base of the fruit and ruining the taste), Splitting Fruit (it splits open) and Blossom Drop (the flower bud falls off) are all caused by irregular watering, or overwatering. Follow a regular watering routine to the base of the plants, not their leaves, and it should ensure none of these problems happen.
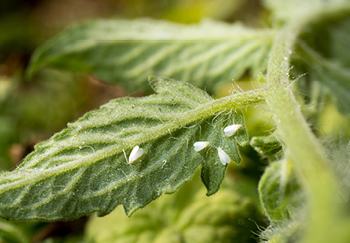
Pests
There are a few pests that can ruin your plants, such as greenfly, whitefly, and aphids. Thankfully, plenty of repellents exist which can be bought to protect your tomatoes. Spray as soon as you notice them.
Enjoy!
There you have it. Soon you’ll be well on your way to growing your own plentiful harvest of deliciously fresh tomatoes at home. You will notice the difference in flavour right away, they will be nothing like your typical store-bought tomatoes. What will you do next? Pick and add to some summer salads? Sun-dry some? Make your own tomato soup or ketchup? Whatever you do you’ll have established how to grow your own tomatoes at home from seed to harvest every summer.