How to Lay Turf
August 18th, 2021 | Categories
So, you want to create a new lawn because your existing lawn is tired and there are too many weeds now, or maybe you moved into your first home and are putting a fresh lawn down for the first time. And you want to do it yourself. Whatever the reason for laying a new lawn from turf yourself this guide will take you through the process, so you get it down with minimal problems during and afterwards. Thankfully, laying turf is a relatively straightforward job, so long as you know what you are doing, and, you have the right tools for the work ahead.
If you don’t prepare correctly, you can encounter some very annoying future problems like lumps and bumps, bits of grass not growing correctly, dry bits, even complete failure of large sections. Turf is expensive and you’re going to all the effort to lay it so naturally you don’t want that to happen. Follow our advice in this guide and you’ll know exactly what to do to give your fresh turf the best start and highest possible chance of success. Let’s get into it.
Best Time of Year to Lay Turf
We feel turf is generally best laid in autumn and even in winter up until the point when the soil is too wet or frosty. In summer, the ground can be too warm and dry which can affect root growth and water absorption. That’s not to say you can’t lay a turf in the summer, many people do it, but it does come with a higher risk of failure. Most professional gardeners will advise planting anything in autumn as it really does have the most optimum conditions: it’s cooler, but the temperature still warm enough to encourage good growth, there’s a good amount of moisture in the soil, and plants/grass aren’t trying to divert a lot of energy into growth.
Also, when turf is laid in autumn it means in the preceding months up until next summer little mowing is needed so newly laid turf can be left relatively undisturbed to settle. Having to mow newly laid turf that hasn’t taken root can stress it out. Laying in the autumn means you have the optimum weather conditions with the added advantage that you won’t need to mow it much if at all.
What You’ll Need to Lay Your Turf Successfully
Do not tackle the job of laying a new turf without these pieces of key equipment:
- Sharp Spade
- Sharp Knife
- Garden Fork
- Sturdy Rake
- Wheelbarrow
- Topsoil & Compost
- Weed Killer
- Wooden Planks
- Garden hose or sprinkler
You might have to purchase some of these items, but if you intend to do more work in the garden, they’ll pay dividends for years. Many come with guarantees too. If you’re replacing an existing lawn that’s quite large, you may be better hiring a turf cutter. Otherwise, be prepared for quite an arduous time of ground preparation. It can be quite backbreaking! The other thing you’ll need when laying turf is the time to act promptly. By this, we mean it is best to have your site prepared first, so that when the turf is purchased or arrives you can get to laying it within 24 hours. Leaving it rolled up any longer will see it turn yellow in just a few days.

Step 1: Calculate How Much Turf You Need
It might seem like a no-brainer, but you wouldn’t be the first person to end up short when it comes to rolls of turf. The reason for this is primarily due to cutting and wastage. Turf is sold by the square yard and packaged/delivered in rolled strips. Check the sizes and amount, and make sure it covers the area, then allow for about 10% extra on top to cover the inevitable cutting and wastage.
Step 2: Preparing The Ground
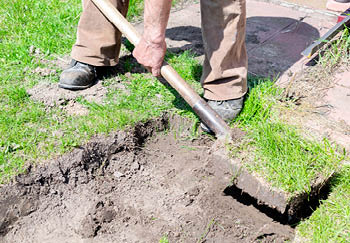
Preparation is key when it comes to laying your turf. It’s the difference between successful rooting and establishment and failure. It really is worth putting in the effort here to get it right. If you are removing an existing lawn, there are several ways to do this. Though for those who have no existing lawn then scroll down to the next paragraph. For those who do however, your first task is water the ground if it isn’t already moist. This will help you to remove it. Next on to your turf cutter, or combination of sharp spade and knife, to start stripping the existing lawn.
The turf cutter will make this quite simple and will roll the turf it cuts up as it goes. If using the more manual combination of spade and knife, cut the turf with the spade into manageable square or rectangular chunks. How deep you will dig will depend on the roots of the old grass. Chances are they’ll be quite established. This may mean you are digging up quite thick chunks. Your knife will come in handy to separate the turf from the soil underneath.
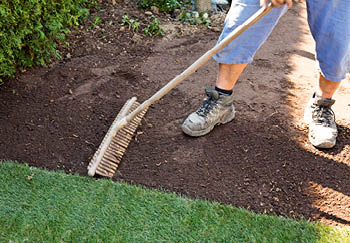
By the end it might look like you’ve removed quite a lot of the top ground, and this is where a good topsoil will be used to negate the loss of soil before the new turf goes on. Before you apply the topsoil though you could spray a weedkiller over the area if you have previously battled any pesky weeds as these will compete against your new turf! Additionally, you will want to fork and rake the soil BEFORE applying the new topsoil, to loosen thick clumps of soil and get rid of any stones.
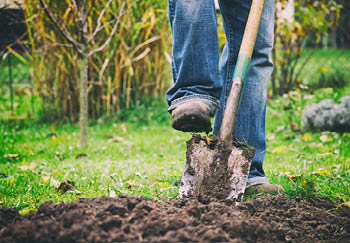
Now, once done, or if you had no existing lawn to remove, take your fork and spade and dig over the area to be turfed loosening and shifting the soil. This is called turning over and should be done to about a depth of 20cm. This will add air to the soil, uncompact it, and allow you to get rid of any weeds, rocks or other debris that might affect the rooting of the new turf. If you have a soil improver such as a multipurpose compost or equivalent, dig this into the existing soil now. If you had to remove an existing lawn and took a good chunk of soil away with the roots of the grass, you can also spread fresh topsoil at this stage to make it back up again.

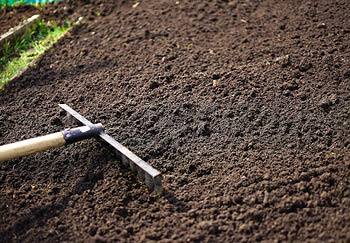
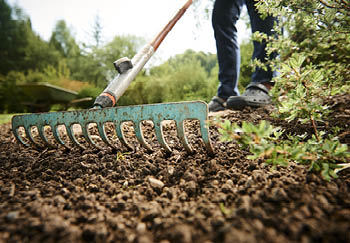
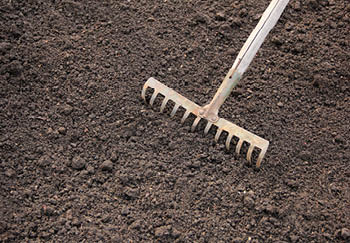
Step 3: Raking & Levelling
Rake the soil to level it out and to a point where it starts to look nice and fine, and level. Once this is done, walk up and down on the soil taking small but heavy steps. This will squeeze out any air pockets without overly compacting the soil again. If you find any dips as a result of this process, go back over with the rake to level out, or apply some topsoil and rake again. Ensure all dips are dealt with before moving on to laying the turf otherwise your turf can be uneven.
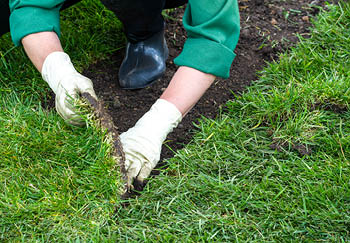
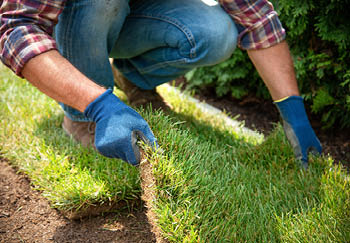
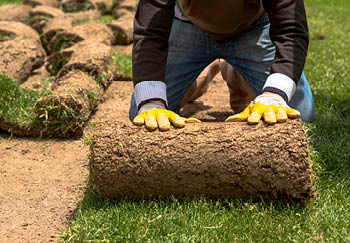
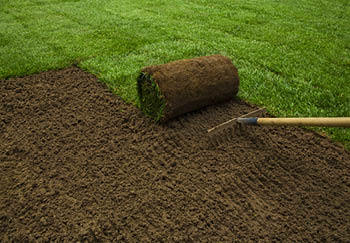
Step 4: Laying the Turf
As already mentioned, you really want to lay the turf as soon as you have it. Otherwise, it will die. Start laying your turf from the outside in (from the turf side and not from the soil side) along a straight edge. The wooden planks will come in handy here. Butt each piece up closely to the last ensuring no gaps between until your area has been completely turfed. Use your knife to remove any excess pieces of turf that’s too long or may be hanging over edging for example. If you have any small gaps, cut a bit of turf from your excess pieces and shape in. An additional tip, if you have any outer edges of turf exposed, perhaps one side meets a border, just cover with some topsoil lightly to prevent it from drying out. Once it’s more established this can be removed.

Step 5: Completion & Aftercare
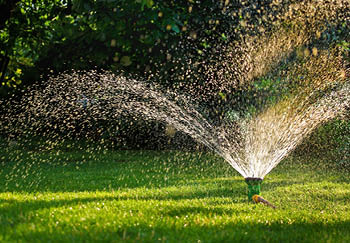
It will take a good few weeks for your turf to initially establish and become your new lawn. Try not to walk on it at all in this time. Additionally, it’s essential you don’t let it dry out so water regularly with a hose or sprinkler. Be careful not to overwater, as this can lead to shallow rooting. You are free to mow the grass once it has grown to about 5 – 10cm, but make sure the lawnmower blades are on the highest setting.
Appreciate the Lush New Lawn
Good job! Now you can sit back and appreciate your new beautifully lush and healthy lawn. When the lawn’s first summer comes around, be sure to water well and it will also benefit from a feed of an appropriate grass fertiliser to keep it looking lush and healthy too.

Useful Links
- Shop Online for Turf
- Shop Online for Lawn Care Products
- Removing Lawn Moss and Thatch (Video)
- Mowing and Trimming your Lawn (Video)
- Aerating and Levelling your Lawn (Video)
- Autumn Lawn Care (Article)
- Winter lawn Care (Article)
- Top Tools for Lawn Care & Maintenance (Article)