Viola Growing Guide
September 11th, 2020 | Categories
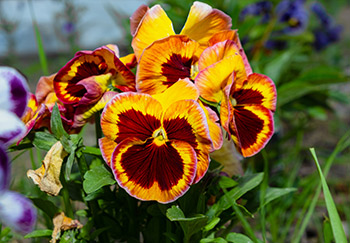
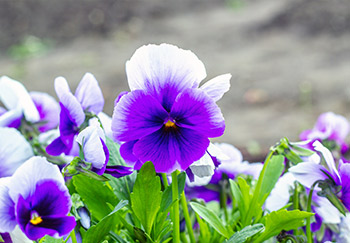
The Viola is a pretty diverse genus! There are all sorts of violas that gardeners up and down the country love to grow, each a delightful addition to any horticultural space. From seasonal colourful pansies to perennial species which can give you years of joy, violas are a firm national favourite and well suited to our climate.
Violas are flowers that have pretty much been with us as long as we can remember. Native across Europe, they have been a feature of gardens since as long as gardens have been cultivated. And the long time they have been to hand has given rise to many uses for these attractive flowers beyond the strictly horticultural. It may come as a surprise to some that violas are fully edible and have various culinary uses, from providing an exotic decoration to salad or as an ingredient in poultry and fish stuffing.
Certain cultivars of violas can have distinct aromas, suffusing the air of your garden with notes of vanilla or wintergreen. Indeed, the viola odorata cultivar is frequently used in the perfume industry as a scent in itself or as a constituent scent in many marvellous olfactory creations.

Attractive, versatile and long lasting, violas can find a home in just about any garden, being readily available and not at all difficult to plant, grow or care for.

How to Grow
Preparation
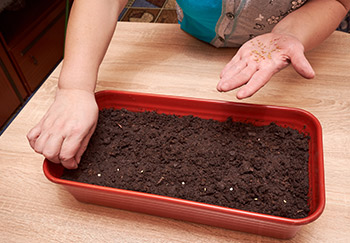
Violas can be grown both from seed in containers or planted out as fully or partially formed. If you find yourself in the former situation, you can truly optimise your growing conditions. Violas can tolerate a range of soils but generally like things moist, well-drained and slightly alkaline. Violas can be started off inside in seed tray and planted out usually around four to six weeks later. When planting out your seedlings, it’s a very good idea to acclimatise them first by placing them outside for a few hours each day, then bringing them in at night, for a short period before you put them in soil and leave them outside permanently.

If you’re planting your violas outdoors, it’s best to do this in early spring as, although a tough little flower, your seedlings will have the best chance once the worst of the winter frosts have passed. Viola’s have that somewhat awkward disposition of preferring things sunny, but not terribly warm. This will pose no problem in spring and autumn but, in summer, you’ll want either dappled or partial shade to protect them from the excesses of the sun. If you’re sowing directly into your soil, dig in a good amount of organic matter to really optimise your violas’ early growth.

Planting
The planting method for your violas depends on whether you are planting out bedding viola plants, seedlings which have been started off indoors or sowing directly into the soil.
The planting method for the first two are similar (with the additional step of acclimatising your seedlings as covered above). To plant these violas, simply loosen the soil around their roots and plant them at the same depth at which they lay in the propagator tray or the plant pack. You’ll want to ensure the weather isn’t taking a downturn when you plant them out. To plant, simply place mounding violas about 6-8 inches (15-20cm) apart and trailing violas 10-12 inches (25-30 cm) apart.

To sow directly into the soil, again wait for good, or at least stable, weather before you do so. Then simply loosen the soil a little, moisten and sow evenly across the space. Afterwards, cover the seeds with a little soil so that they’re not exposed to the elements and keep the area consistently moist throughout the violas early growth.
Ongoing Care
Violas are pretty drought resistant flowers and can tolerate occasionally going dry. This is handy for your watering schedule as it provides a useful and obvious indicator of when they need a top up. Apart from freshly sown viola seeds – which should be kept consistently moist – you can allow the colour and texture of the soil to be your guide. Simply allow your violas to use up all the water, then reapply!

In terms of feeding, violas respond well to a slow release fertilizer added to the soil. The time to do this is in spring and then again in late summer. Naturally, compost, mulch or some other organic material dug into the soil ahead of planting is a great way to optimise your violas’ growth.
Generally speaking, don’t let your violas rest in cool and wet conditions. By keeping an eye on things and ensuring your violas receive plenty of sunshine and good air circulation, you can be sure of excellent blooms.

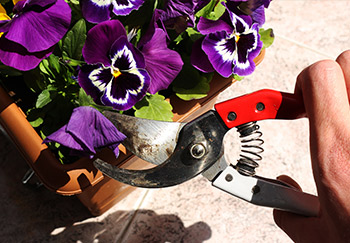
Pruning and Deadheading
Violas respond well to deadheading, especially those perennial varieties which can bring you extensive blooms year on year. Faded blooms should be pinched off at the base of their stem. Some larger and more shrubby violas might overreach themselves a little laterally, becoming a little overgrown and leggy. You can sort this problem by cutting back such plants to around three or four inches (7-10cm) tall.